date created: 4th november 2022
last edited: 4th november 2022
_____BEGIN TRANSMISSION_____
autolight is one of the first of my latest era of portal levels (hazard zone was the first, which i may go back and make a post about that later), and since i'm a lot older and more experienced with level creation now, i like to think the level quality has gone up significantly since i started making levels (see: room to of reflector gel test :vomiting emoji:). also remember: solution spoilers for the map! if you want to play it first, click here!
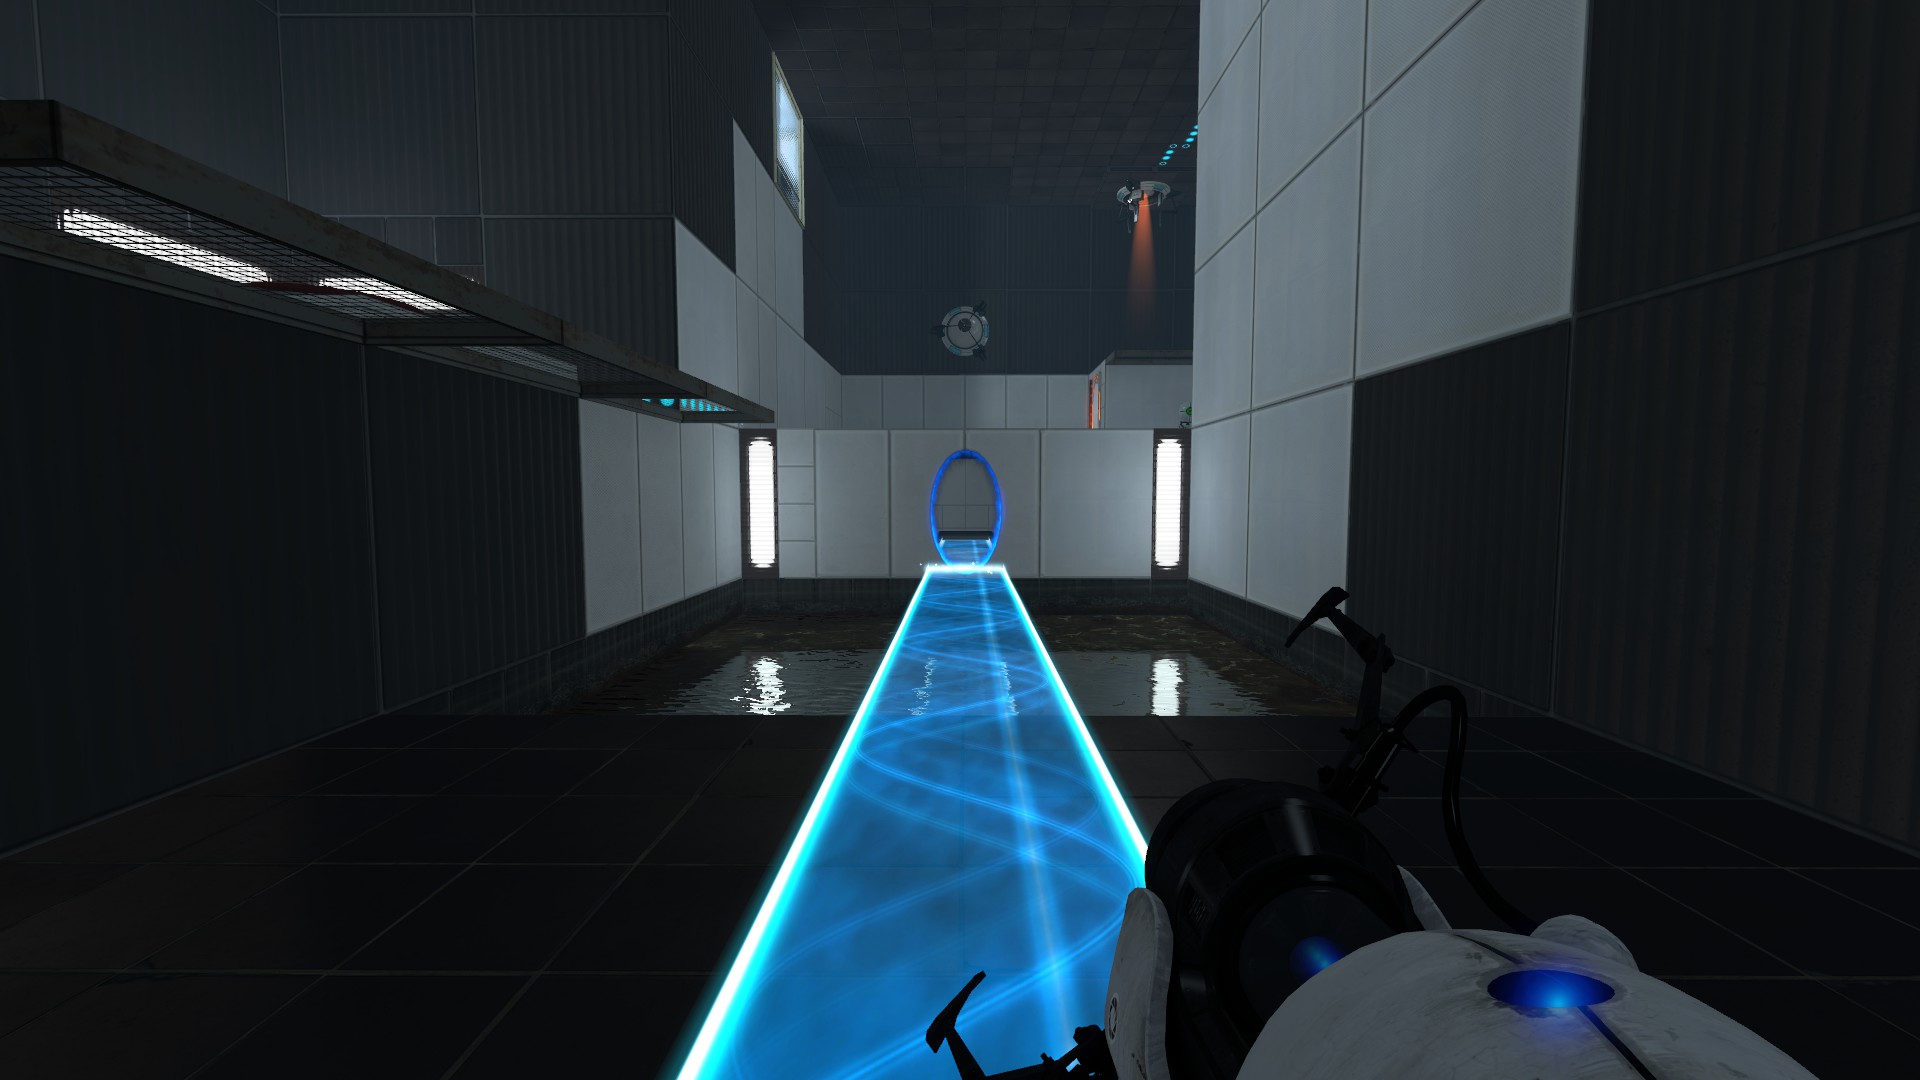
for starters, there was a good amount of thought put into making sure the player understood exactly what the deal was as soon as they walk out of the enterence. there's very obviously the goo, and with no portal surfaces on the side of the goo pit the player can access, they *have* to place a portal away from them. if the title didn't tip them off already, this is when it becomes apparent that the gimmick of this test is that there is always going to be a light bridge coming from the blue portal that the player can control.
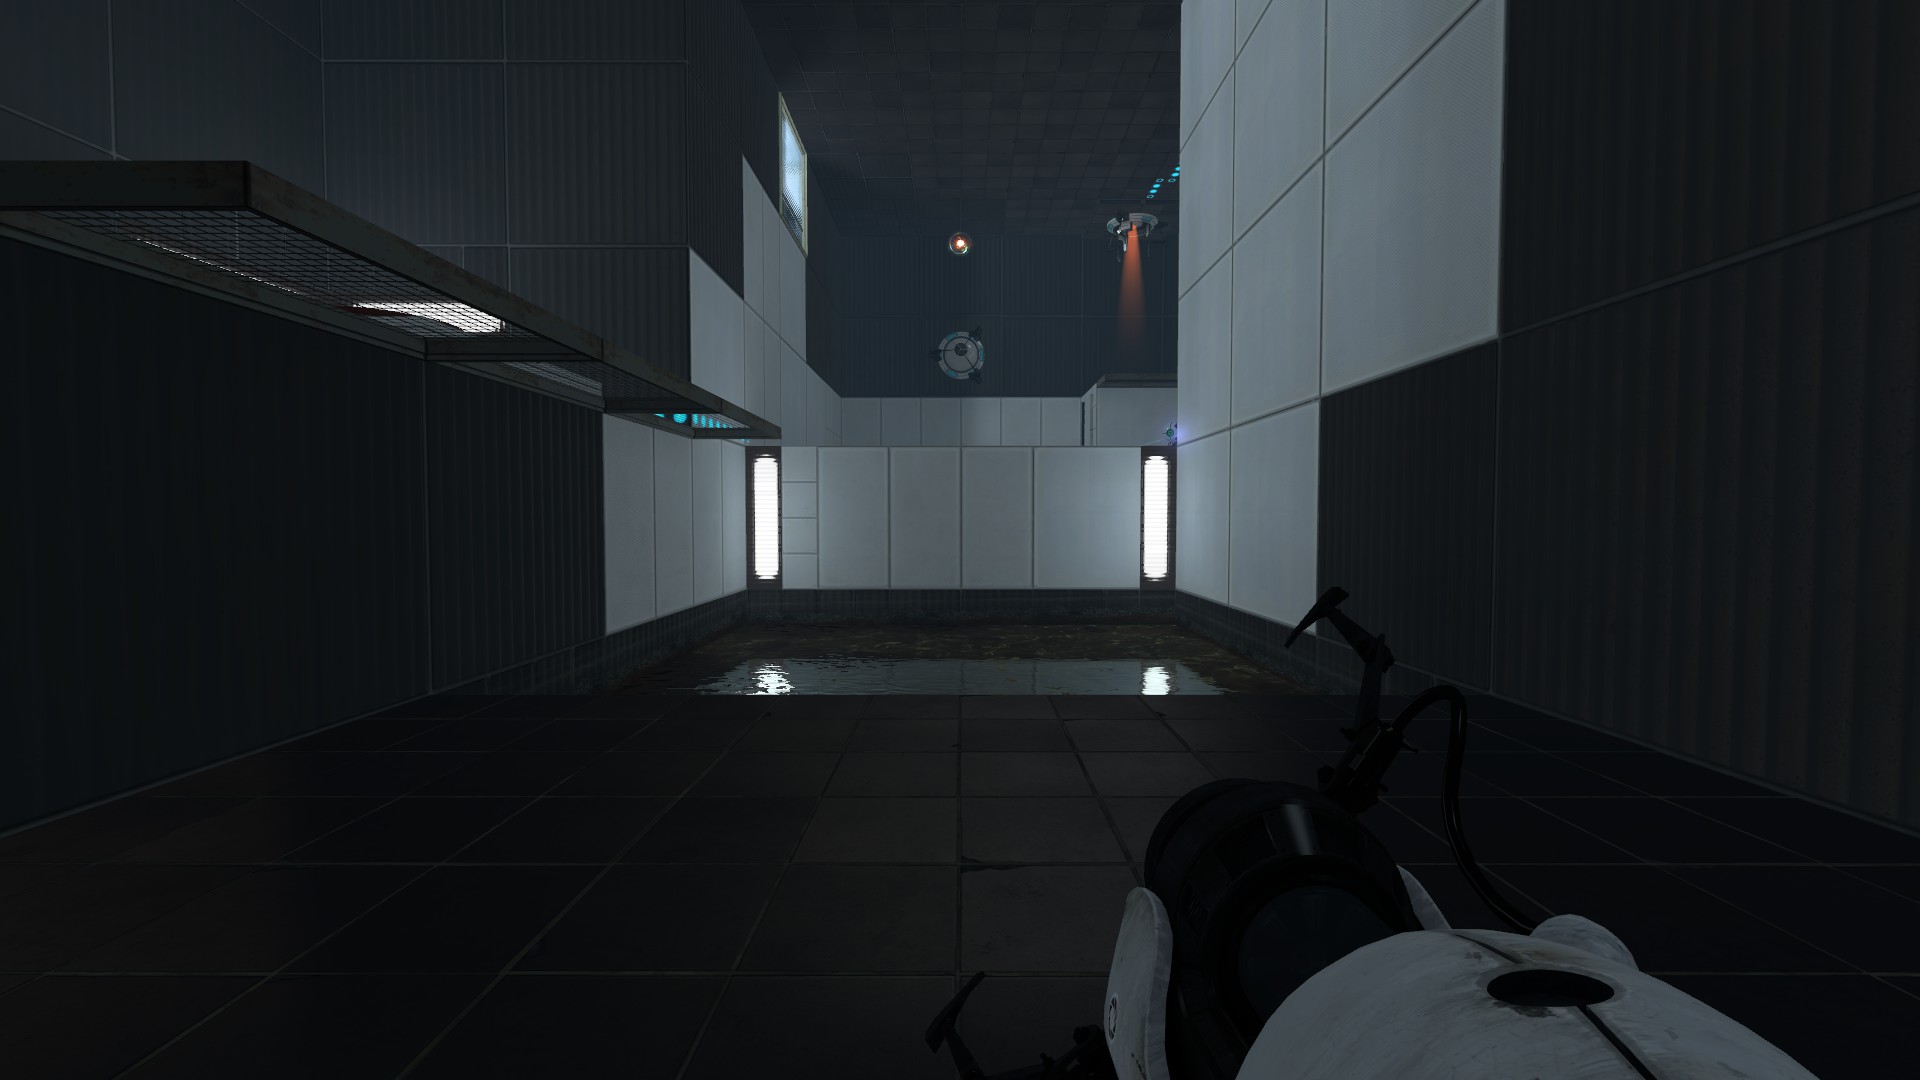
the other thing to notice is the HEP launcher & catcher, both visible from the entrance, so the player knows immidiately what the goal of the level is - get ball in hole.
once you're on the "main island", you get a clearer image of how to go about this. the button is the first thing you'll see as you rotate after going through the portal, and the cube is clearly seen on it's own ledge off to the side. you'll also see the exit door, again on it's own ledge, with no portal surface either on the platform or across to make it accessable with the light bridge.
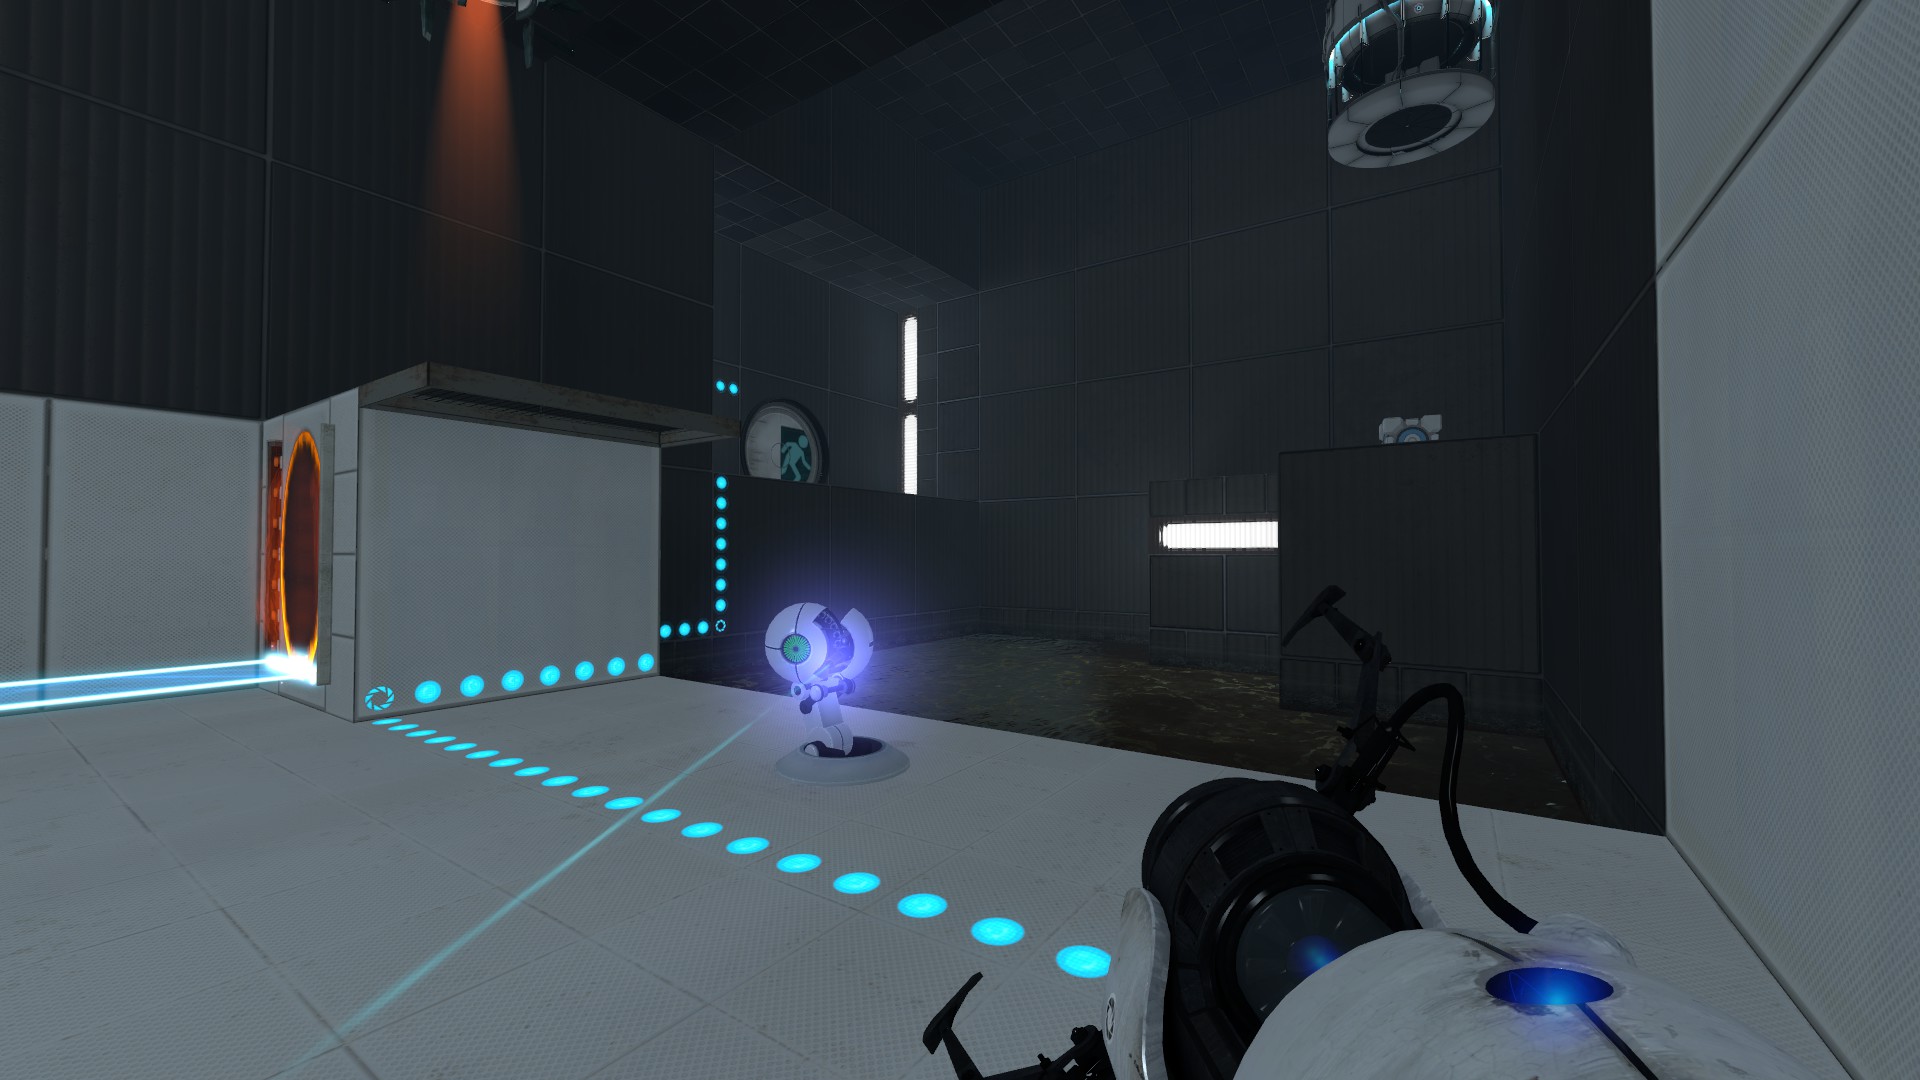
the pieces should then fall into place quickly. even if you don't look at the antlines, it's pretty simple deduction that cube + button and ball + hole will solve the test. this first room is largely getting the player used to being forced to use a test element, and how it does and doesn't affect the elements in the chamber (such as the HEP). the only other thing in the room is the rocket turret, which while is really just there because rocket turrets are fucking awesome, it does actually interact with the level as not only does it force the player to keep moving (which i suppose artificially increses the difficulty so might not be a great choice for the test), but it can also shoot the cube off the button, so it does pose some kind of non-lethal threat.
a key thing about single portal levels is that to make a single portal level good/better, the autoportal should have multiple uses unless it's like a small tutorial level. so in this test, the purposes of the autoportal are:
- recieve the light bridge (obviously)
- allow redirection of the HEP
it's maybe not much, but for a warm-up first room it's enough. since the light bridge already has multiple uses in getting over the tutorial goo, getting the cube and getting to the exit, this balances out the "lack" of things the orange portal does in total.
the only other things worth mentioning with this room is the half-size grating ledges and the lighting. the ledges are just in place to give the player a bit more room for error, especially on the ledge where you need to be above the portal surface to redirect the HEP into the catcher, so the ledge lets you move around more to avoid the rocket turret. the lighting is also mainly used to highlight important areas - light strips around the exit door and the cube ledge draw vision over to them to help with understanding where to go.
room 2:
the next room builds off of the same stuff (HEP & light bridge), but swaps out the rocket turret for regular turrets, and adds a laser. each element comes in waves however, so you don't have access to everything from the get go. instead, you kind of "unlock" each element as you progress.
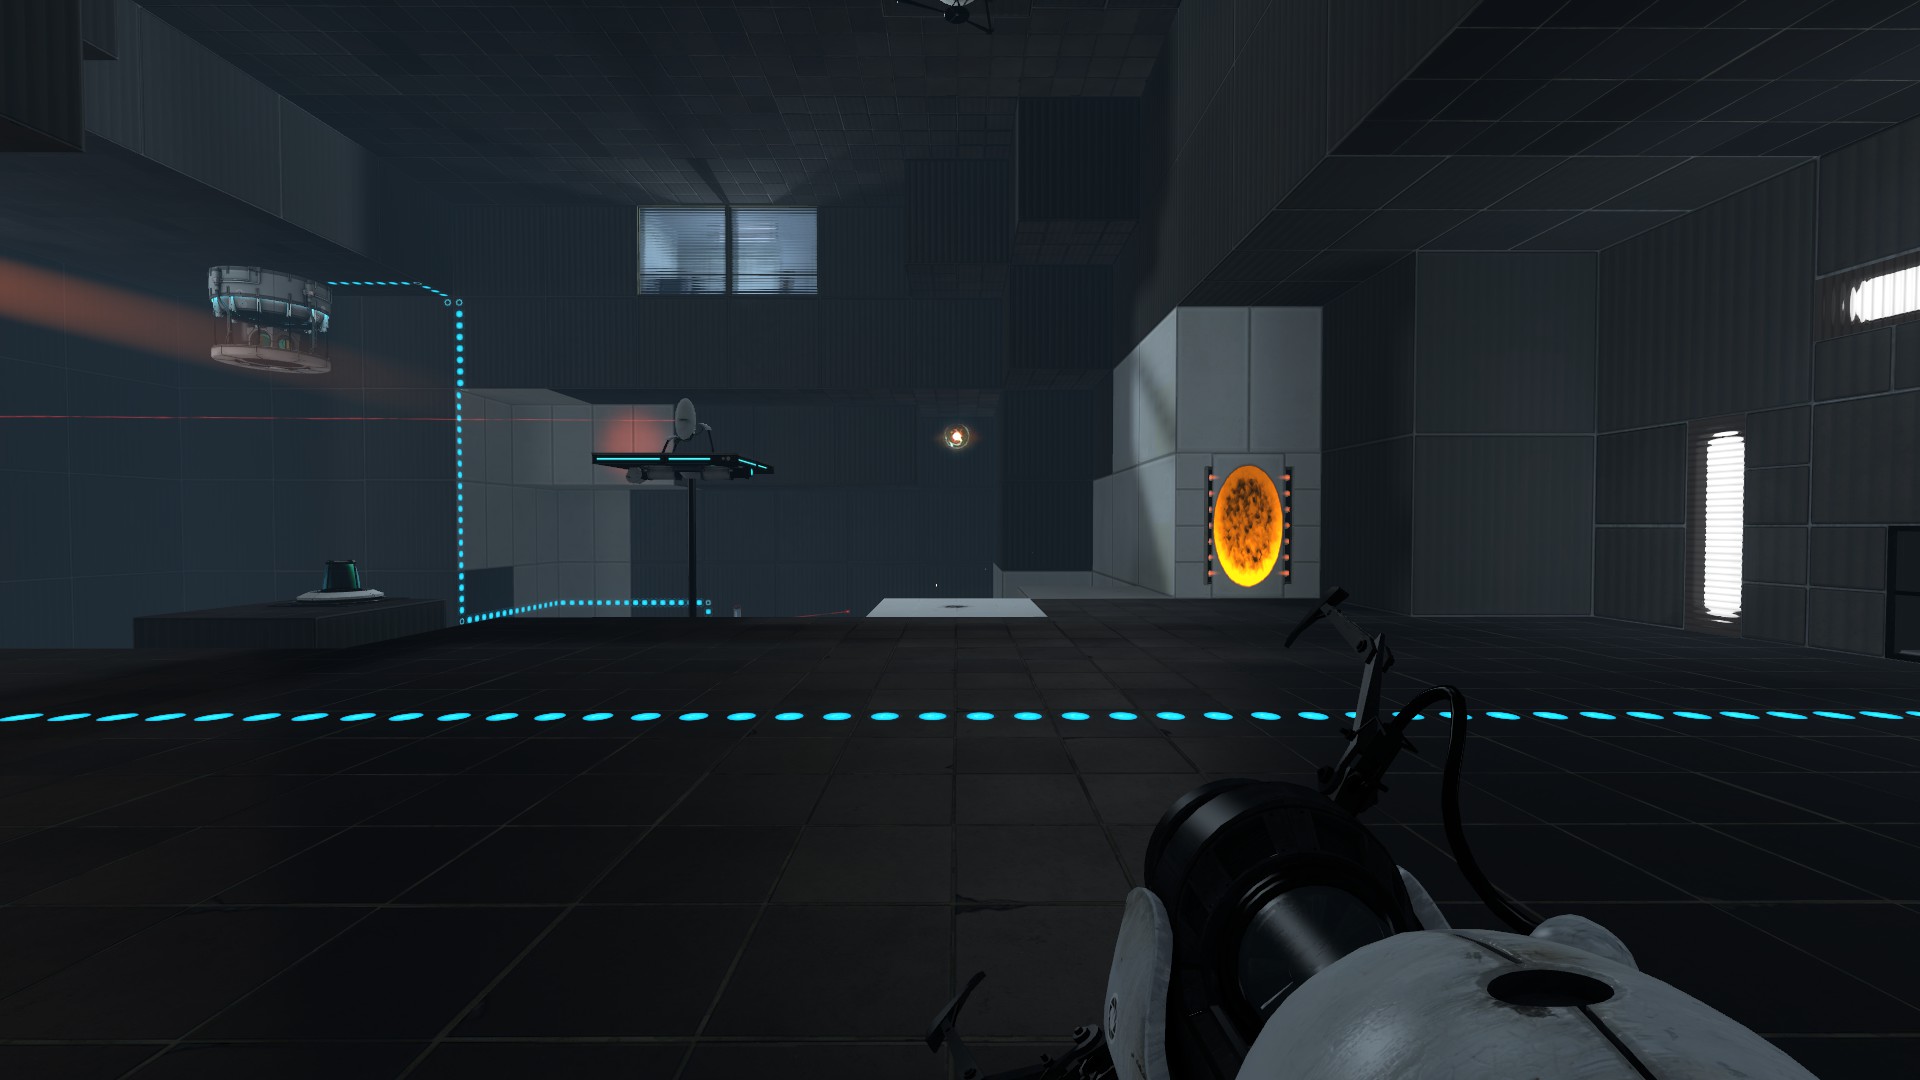
as you walk in, you can see the HEP launcher, an orange autoportal with (currently) nothing going into it, and (hopefully) in the distance a pedestal button above the goo. in this chamber, the HEP launcher doesn't get disabled after the pellet is caught, which allows you to still be able to take out the turrets in a similar vein to test chamber 18 in portal 1 even after activating the catcher (this wasn't intended but it worked out lmao).
once the laser is activated, the only thing that you can do with it is redirect it to the relay, which activates the light bridge as the laser catcher is on a wall inaccessible by the laser currently. one quick thing to mention here is that since the relay is on a pillar of ground unlike the platforms the turrets are on, this reduces visibility of the end section. i really don't like this, but it's just how it is since the in game editor won't allow a relay on a platform and i've not used hammer to edit portal 2 custom maps as of writing.
either way, now with the light bridge you can get the next cube from the button, which you can place on the light bridge to exit the level. one thing that's interesting to note is that when i watched a friend play this level, they opted to try and stick the cube behind the relay still on the platform, without using the light bridge. i deliberately made this as close to impossible (read: very annoying) to do, and i think that the reason they did this is either:
- since they're not an experienced player, the object permanence of the light bridge & the idea of it being able to hold the cube isn't as set in their brain like it is with me, or:
- i'm just the map maker and so i just know how to do it intentonally and they don't since they didn't make the map.
i'll take the opportunity here to beg for engagement so if you play the level and have read this, comment on the workshop page if you're a ledgehead or a bridgehead, since i'm interested in which is more common in the average player.
anyway, that's it for this post. i'm gonna hopefully do one for all of my recent levels (and maybe an overall one for my older ones since i don't remember my process for making them like the new ones), so if you're a fan of these it'd be cool to see :)